
Row Level Security Primer

Row-Level security or RLS in Power BI is an important security feature that allows an analyst to granularly filter data based on the end user's credentials or other criteria. RLS ensures that you as an analyst can control access to sensitive data, preventing unauthorized users from seeing things they shouldn't. This post contains a high-level overview on RLS as well as a tutorial on implementing Row Level Security in your Power BI report.

Row Level Security is basically an extension of the Data model which limits the ability of users to view specific rows of data. RLS is basically just a filter on the data that is based on the user and controlled by the Power BI report creator or admin.
Here's how RLS works in Power BI:
Define: As a Data Analyst, you define data roles informally, data roles represent different levels of access or user groups.
Create: For each data role, you create row-level security filters or rules which define conditions under which rows from the data model are visible.
Map: You map individual users or groups to the defined data roles which determines which RLS rules apply to each user as they access the Power BI report pages.
Execute: As users interact with Power BI reports, RLS rules are applied dynamically and only the rows that a user is authorized to see are aggregated and displayed.
Applications of Row Level Security in Power BI
Row Level Security can help you to control access to data based on region, department, customer and confidentiality.
Region/Geography - sometime data visibility needs to be restricted based on geography.
Department/Business Unit - sometimes data is restricted to be viewable only to people in the relevant business unit.
Customer - Sensitive sales data should only be visible to the sales team responsible for the specific customer.
Confidentiality - Some data should only be viewable by executives who use it to make important strategic decisions for the business.
So enough with the theoretical foundation of how RLS works and what it is used for, now I’m going to show you how to create Row Level Security in your Power BI Report as well as the steps I take to test my RLS groups.
Row Level Security Tutorial
Today, I’ll be creating a very basic Power BI report with three tables that I will use to then show you how to implement Row Level Security. If you want to follow along in Power BI, the setup should take you less than 5 minutes.
RLS Tutorial Setup
For each of the tables, you can manually enter in Power BI.
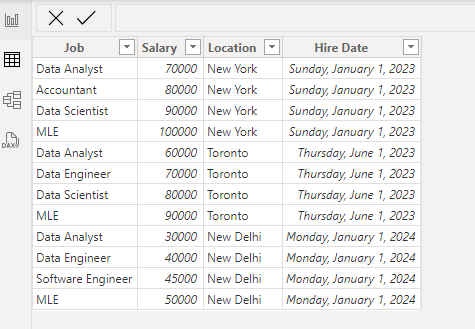
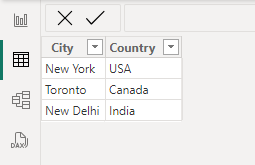
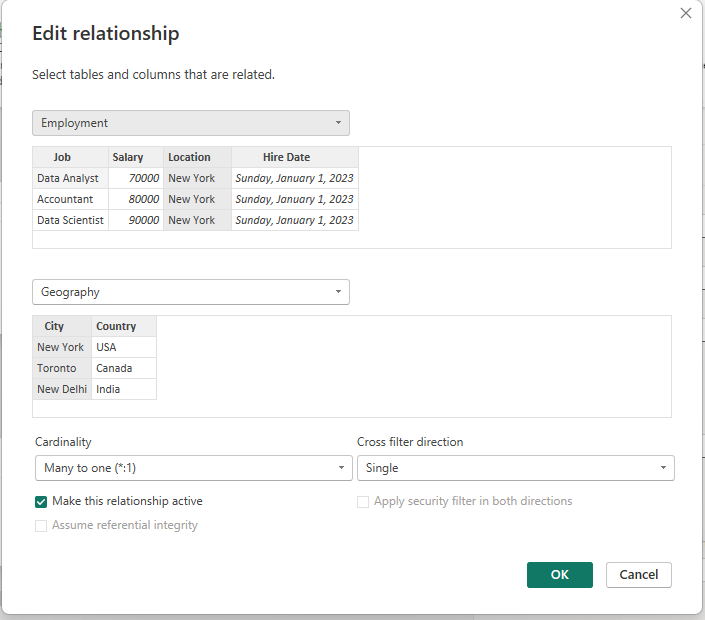
You’re also going to need to build the data model. For now we’re just going to create a relationship between the location column in the employment table and the city column in the geography table. The relationship should be many (from employment) to one (to geography).
Creating Row Level Security
There are two ways to create row level security:
Creating a permissions table.
Creating RLS and controlling from the workspace.
Controlling RLS with a Permissions Table
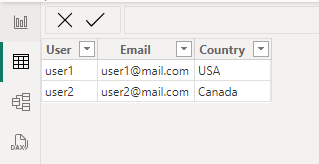
The first way of controlling RLS is with a permissions table. Table 3 (Permissions) that we created above is a permissions table. A permissions table has rows with usernames and/or emails and corresponding rows for RLS filtering. For this permissions table our RLS is based off of the “country” column.
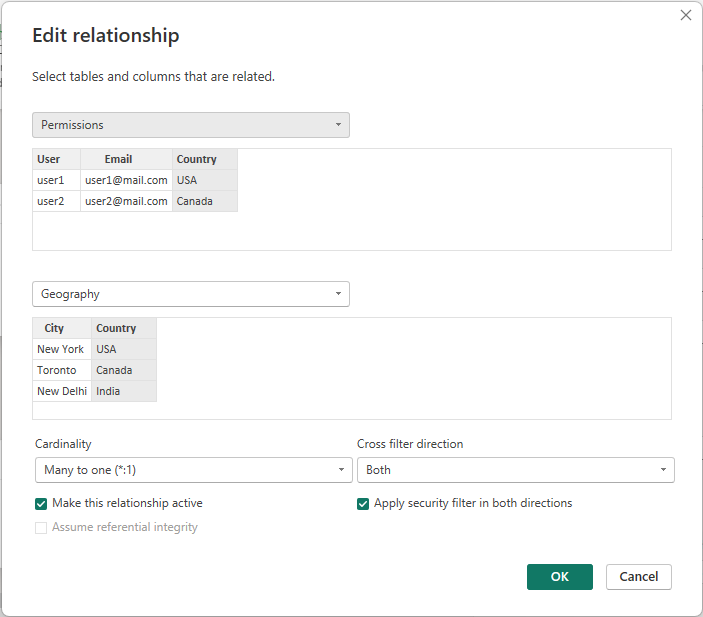
You need to add your permissions table into the Data Model. For RLS to function correctly, you will need to change cross-filter direction to both and check the box to apply the security filter in both directions.
Now its time to test things out. Click on modeling and manage roles at the top of your Power BI home page. Create a new role, in this example I called this role “USPermissions.”
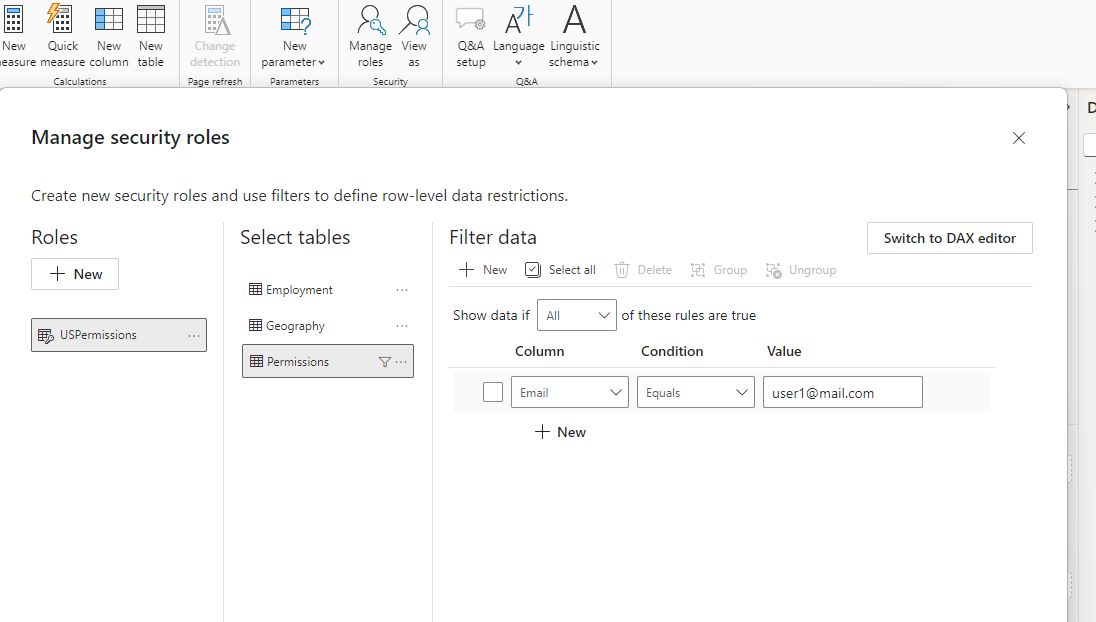
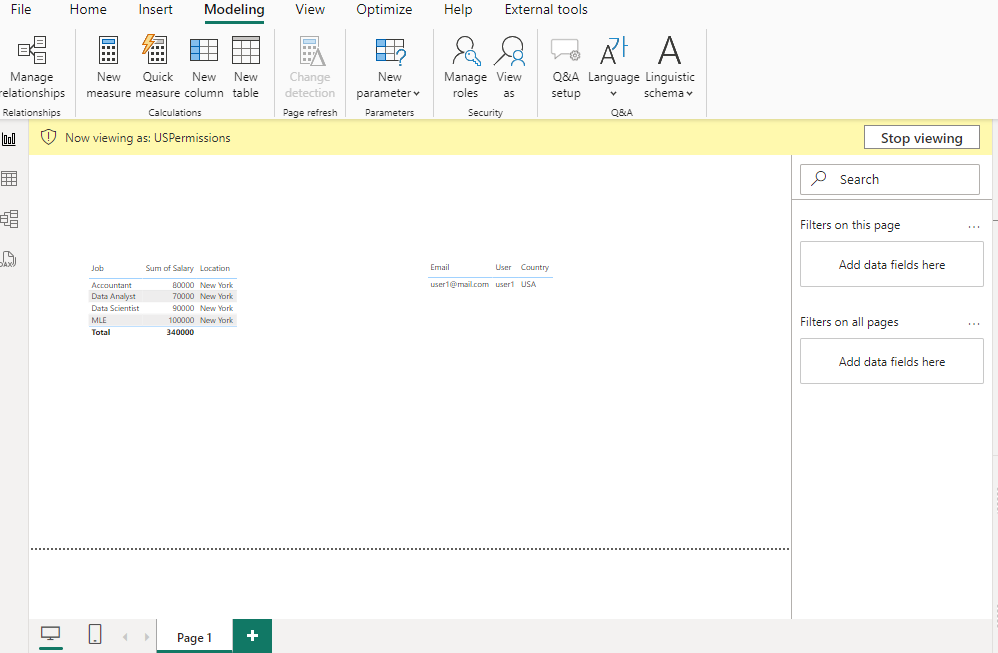
Select your permissions table and specify what email address you want to view. What you’re seeing here is how the RLS works for someone with the email address user1@mail.com who can ONLY view the data for the geography “USA.”
Controlling RLS From the Workspace.
As a workspace admin you can put users into specific workspace groups that control access to information. The main difference is that you need to specifically add/remove people from RLS buckets in the workspace.
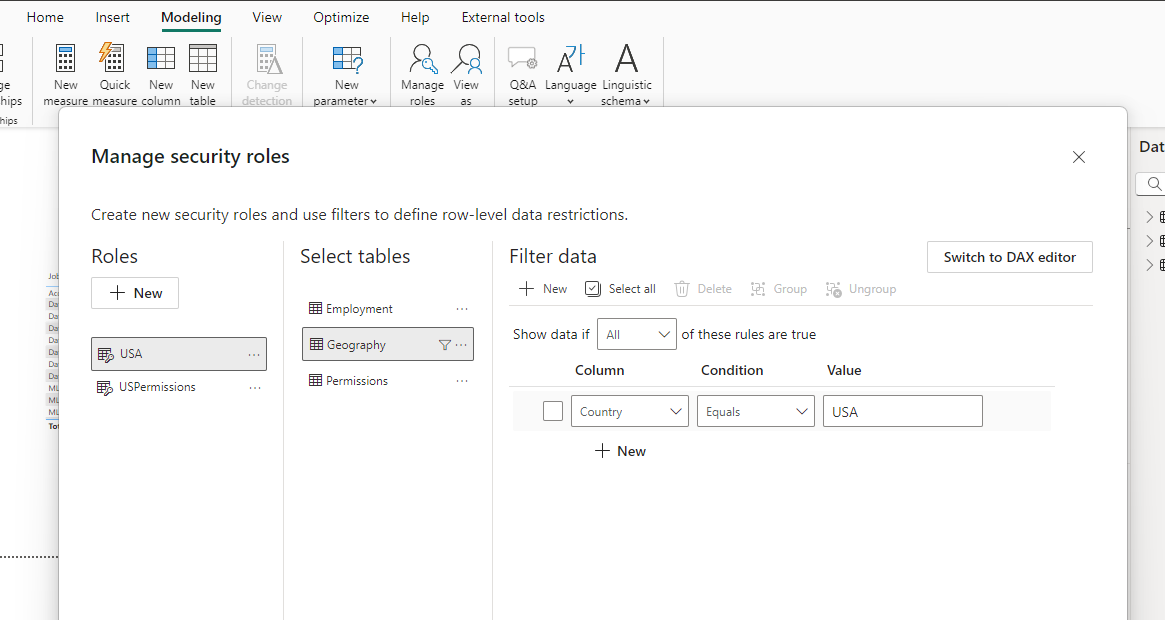
Creating RLS buckets in your report is very easy. Go to the modelling tab click manage roles, and click new.Name your new role, select the table that you want to filter for, in this case, USA and enter in whatever logic you want to power your RLS. For this role, the logic is country equals USA.
You will need to undo the “apply security filter in both directions” for the relationships if you’re testing out the workspace method after the permissions table method.
To test out click View As and USA.
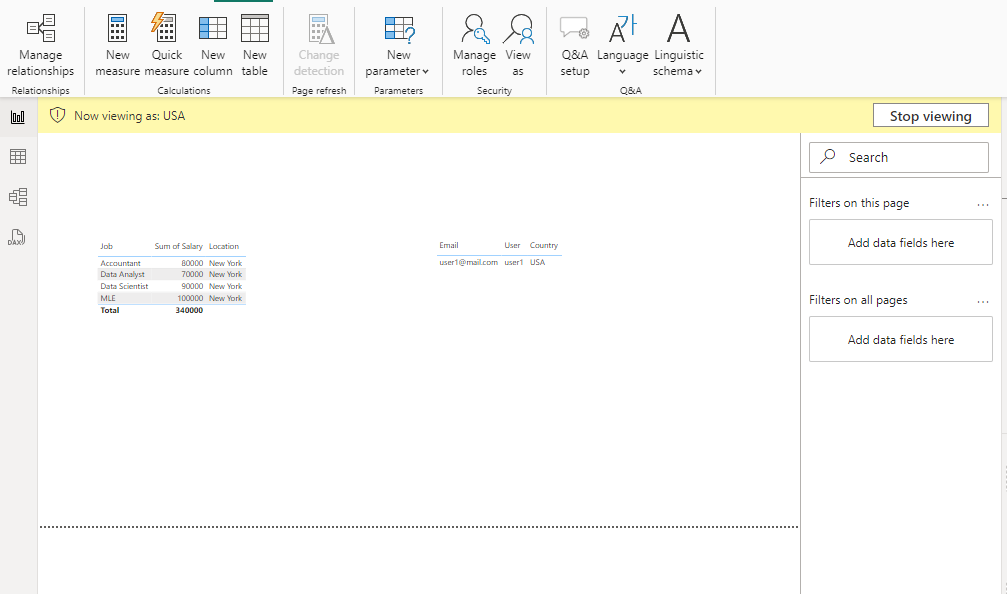
Conclusion
There you have it, two ways of using RLS or Row Level Security to control access to your data. RLS plays a big role in maintaining Data Security at large corporations, using it will be a part of your Power BI duties if you ever use it professionally.